Unmasking the Invisible: A Deep Dive into Additive Manufacturing Defect Characterization. Discover the advanced techniques and critical insights driving quality and reliability in 3D-printed components.
- Introduction: The Critical Role of Defect Characterization in Additive Manufacturing
- Types of Defects in Additive Manufacturing: From Porosity to Cracking
- State-of-the-Art Detection Methods: Imaging, Sensors, and Beyond
- Non-Destructive Testing Techniques for Real-Time Quality Assurance
- Data Analytics and Machine Learning in Defect Identification
- Case Studies: Real-World Failures and Their Root Causes
- Impact of Defects on Mechanical Properties and Performance
- Strategies for Defect Prevention and Process Optimization
- Future Trends: AI, Automation, and Next-Gen Characterization Tools
- Conclusion: The Path Forward for Defect-Free Additive Manufacturing
- Sources & References
Introduction: The Critical Role of Defect Characterization in Additive Manufacturing
Additive manufacturing (AM), commonly known as 3D printing, has revolutionized the production of complex geometries and customized components across industries such as aerospace, automotive, and healthcare. However, the layer-by-layer fabrication process inherent to AM introduces a unique set of defects—such as porosity, incomplete fusion, residual stresses, and surface roughness—that can significantly compromise the mechanical performance and reliability of printed parts. As a result, defect characterization has emerged as a critical area of research and industrial practice, aiming to identify, quantify, and understand these imperfections to ensure the structural integrity and functional performance of AM components.
Effective defect characterization enables manufacturers to optimize process parameters, improve material selection, and implement robust quality assurance protocols. Advanced characterization techniques, including X-ray computed tomography, scanning electron microscopy, and in-situ monitoring systems, provide detailed insights into the nature, distribution, and evolution of defects during and after the build process. These insights are essential for correlating process conditions with defect formation mechanisms, ultimately guiding the development of defect-mitigation strategies and qualification standards for AM parts. The growing adoption of AM in safety-critical applications further underscores the necessity for rigorous defect characterization, as even minor flaws can lead to catastrophic failures in service. Consequently, ongoing research and standardization efforts by organizations such as National Institute of Standards and Technology (NIST) and ASTM International are pivotal in advancing the reliability and widespread adoption of additive manufacturing technologies.
Types of Defects in Additive Manufacturing: From Porosity to Cracking
Additive manufacturing (AM) processes, while enabling complex geometries and rapid prototyping, are susceptible to a range of defects that can compromise mechanical performance and reliability. Among the most prevalent defects is porosity, which includes gas pores, lack-of-fusion voids, and keyhole-induced cavities. Gas porosity typically arises from trapped gases during powder melting, while lack-of-fusion defects result from insufficient energy input, leading to incomplete melting and bonding between layers. Keyhole porosity, on the other hand, is associated with excessive energy input, causing vaporization and instability in the melt pool National Institute of Standards and Technology.
Another critical defect type is cracking, which can manifest as hot cracking (solidification cracking) or cold cracking (due to residual stresses). Hot cracking occurs during the solidification phase, particularly in alloys with a wide solidification range, while cold cracking is often a result of thermal gradients and rapid cooling rates inherent to AM processes The Welding Institute (TWI).
Other notable defects include incomplete fusion, balling (formation of spherical particles due to poor wetting), and surface roughness anomalies. Each defect type is influenced by process parameters such as laser power, scan speed, powder characteristics, and layer thickness. The interplay of these parameters makes defect prediction and control a significant challenge in AM, necessitating advanced characterization techniques for detection and mitigation ASTM International.
State-of-the-Art Detection Methods: Imaging, Sensors, and Beyond
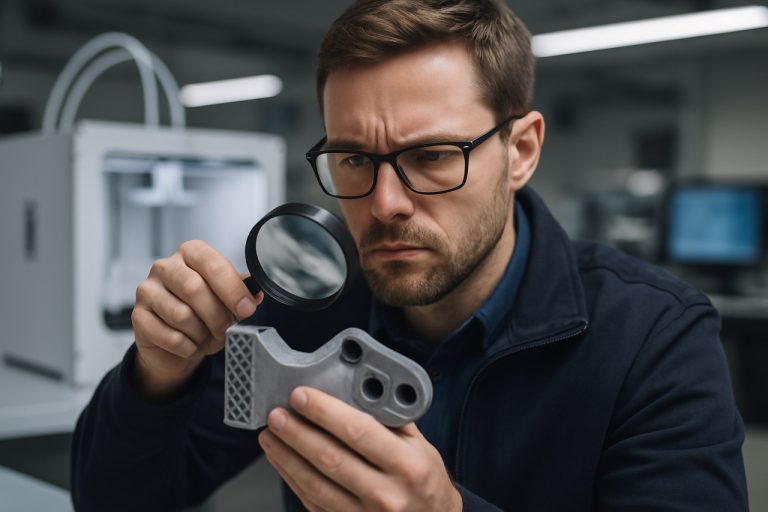
State-of-the-art detection methods for additive manufacturing (AM) defect characterization have evolved rapidly, leveraging advanced imaging, sensor technologies, and data analytics to ensure part quality and reliability. High-resolution imaging techniques, such as X-ray computed tomography (XCT), enable non-destructive, volumetric inspection of internal and surface defects, including porosity, cracks, and inclusions. XCT provides detailed 3D reconstructions, allowing for precise quantification and localization of defects within complex geometries National Institute of Standards and Technology.
Optical and electron microscopy remain essential for surface and near-surface defect analysis, offering sub-micron resolution for identifying microstructural anomalies. In-situ monitoring systems, incorporating high-speed cameras, pyrometers, and photodiodes, are increasingly integrated into AM machines to capture real-time process signatures. These sensors detect anomalies such as spatter, lack of fusion, or thermal inconsistencies during the build, enabling early intervention and process optimization Lawrence Livermore National Laboratory.
Emerging approaches include acoustic emission sensors and machine learning algorithms that analyze process data streams to predict defect formation. Acoustic sensors can detect subtle changes in sound signatures associated with defect initiation, while machine learning models correlate sensor data with defect types and locations, enhancing predictive capabilities U.S. Department of Energy Office of Scientific and Technical Information. The integration of multi-modal sensing and advanced analytics represents a significant step toward autonomous, closed-loop quality control in AM, reducing reliance on post-process inspection and improving overall manufacturing efficiency.
Non-Destructive Testing Techniques for Real-Time Quality Assurance
Non-destructive testing (NDT) techniques have become integral to real-time quality assurance in additive manufacturing (AM), enabling the detection and characterization of defects without compromising part integrity. As AM processes, such as selective laser melting and electron beam melting, are prone to defects like porosity, lack of fusion, and residual stresses, the implementation of in-situ NDT methods is crucial for ensuring component reliability and performance.
Among the most widely adopted NDT techniques are X-ray computed tomography (CT), ultrasonic testing, and optical monitoring. X-ray CT provides high-resolution, volumetric imaging, allowing for the identification of internal voids and inclusions during or immediately after the build process. However, its application in real-time is limited by scanning speed and equipment cost. Ultrasonic testing, particularly with phased array systems, offers rapid detection of subsurface defects and can be integrated into the manufacturing workflow for continuous monitoring. Optical monitoring systems, utilizing high-speed cameras and pyrometers, capture surface anomalies and thermal signatures indicative of process instabilities, enabling immediate corrective actions.
Recent advancements focus on integrating machine learning algorithms with NDT data streams to enhance defect detection sensitivity and automate decision-making. These smart systems can predict defect formation based on real-time sensor data, facilitating adaptive process control and reducing post-processing inspection requirements. The ongoing development of robust, high-speed NDT solutions is pivotal for the widespread adoption of AM in safety-critical industries such as aerospace and medical devices, where defect tolerance is minimal National Institute of Standards and Technology, American Society for Nondestructive Testing.
Data Analytics and Machine Learning in Defect Identification
The integration of data analytics and machine learning (ML) has significantly advanced defect identification in additive manufacturing (AM). Traditional inspection methods, such as visual examination and X-ray computed tomography, are often time-consuming and may not detect subtle or subsurface defects. In contrast, data-driven approaches leverage the vast amounts of process and sensor data generated during AM to enable real-time and automated defect detection. By applying statistical analysis and ML algorithms to in-situ monitoring data—such as melt pool temperature, acoustic emissions, and layer-wise images—researchers can identify patterns and anomalies indicative of defects like porosity, lack of fusion, or surface roughness.
Supervised learning techniques, including support vector machines and convolutional neural networks, have been employed to classify defect types and predict their occurrence based on labeled datasets. Unsupervised methods, such as clustering and anomaly detection, are valuable for discovering previously unknown defect signatures without prior labeling. The effectiveness of these models depends on the quality and quantity of training data, as well as the integration of domain knowledge to interpret results meaningfully. Recent studies have demonstrated the potential of deep learning to achieve high accuracy in defect classification, even in complex geometries and multi-material builds National Institute of Standards and Technology.
Despite these advances, challenges remain in generalizing models across different AM systems and materials, as well as in ensuring the interpretability of ML-driven decisions. Ongoing research focuses on developing robust, transferable models and integrating data analytics with process control to enable closed-loop quality assurance in AM U.S. Department of Energy Office of Scientific and Technical Information.
Case Studies: Real-World Failures and Their Root Causes
Case studies of real-world failures in additive manufacturing (AM) provide critical insights into the root causes of defects and their impact on component performance. One notable example involves the aerospace sector, where a titanium alloy component produced via selective laser melting (SLM) exhibited unexpected fatigue failure during service. Post-failure analysis revealed the presence of lack-of-fusion defects and internal porosity, both of which acted as crack initiation sites under cyclic loading. These defects were traced back to suboptimal laser power settings and insufficient layer overlap during the build process, highlighting the sensitivity of AM outcomes to process parameters (NASA).
In another case, a medical implant manufactured using electron beam melting (EBM) failed mechanical testing due to the presence of unmelted powder particles and microcracks. Detailed characterization using X-ray computed tomography (CT) and scanning electron microscopy (SEM) identified these defects as consequences of inadequate beam energy and rapid cooling rates, which prevented full consolidation of the powder bed (U.S. Food and Drug Administration). Such findings underscore the importance of in-situ monitoring and post-process inspection to detect and mitigate defects before components are deployed in critical applications.
These real-world failures demonstrate that defect characterization is not only essential for quality assurance but also for informing process optimization and design guidelines. By systematically analyzing failure cases, manufacturers can refine their AM processes, reduce defect rates, and enhance the reliability of additively manufactured parts across industries.
Impact of Defects on Mechanical Properties and Performance
Defects inherent to additive manufacturing (AM) processes—such as porosity, lack of fusion, inclusions, and surface roughness—can significantly compromise the mechanical properties and overall performance of fabricated components. These defects act as stress concentrators, reducing fatigue life, tensile strength, and ductility. For instance, pores and voids, often resulting from incomplete melting or gas entrapment, can initiate cracks under cyclic loading, leading to premature failure. Similarly, lack of fusion defects, typically caused by insufficient energy input or improper layer bonding, create weak interfaces that are prone to delamination and fracture under mechanical stress.
The impact of these defects is particularly pronounced in critical applications, such as aerospace and biomedical implants, where structural integrity is paramount. Studies have shown that even small volumetric defects can reduce fatigue strength by up to 50% compared to defect-free counterparts. Surface roughness, another common AM defect, not only affects mechanical performance but also influences corrosion resistance and wear behavior, further limiting the service life of components. The anisotropic nature of AM parts, stemming from the layer-by-layer build process, can exacerbate the detrimental effects of defects, as crack propagation may preferentially follow weakly bonded layers.
Consequently, accurate characterization and control of defects are essential for predicting and optimizing the mechanical performance of AM parts. Advanced non-destructive evaluation techniques, such as X-ray computed tomography and ultrasonic testing, are increasingly employed to detect and quantify internal and surface defects, enabling more reliable performance assessments and quality assurance in AM production (National Institute of Standards and Technology; ASTM International).
Strategies for Defect Prevention and Process Optimization
Effective defect prevention and process optimization are critical in additive manufacturing (AM) to ensure high-quality, reliable components. Strategies for minimizing defects begin with comprehensive process monitoring and control. Real-time monitoring systems, such as optical cameras, infrared sensors, and acoustic emission detectors, enable the early detection of anomalies like porosity, lack of fusion, or surface irregularities. These systems can be integrated with feedback loops to adjust process parameters dynamically, reducing the likelihood of defect formation National Institute of Standards and Technology.
Another key strategy involves optimizing process parameters—such as laser power, scan speed, layer thickness, and powder feed rate—through design of experiments (DOE) and machine learning algorithms. These approaches help identify optimal parameter windows that minimize defect occurrence while maintaining productivity and material properties U.S. Department of Energy Office of Scientific and Technical Information. Additionally, pre-process measures like powder quality assessment and environmental control (e.g., humidity, temperature) are essential to prevent defects originating from material inconsistencies or external contamination.
Post-process inspection techniques, including X-ray computed tomography and ultrasonic testing, are also employed to validate the absence of internal defects and inform iterative improvements in process settings. The integration of digital twins—virtual replicas of the manufacturing process—enables predictive modeling and proactive defect mitigation by simulating various scenarios and their impact on part quality Sandia National Laboratories.
Collectively, these strategies foster a data-driven, adaptive approach to defect prevention and process optimization, advancing the reliability and performance of AM-produced components.
Future Trends: AI, Automation, and Next-Gen Characterization Tools
The future of additive manufacturing (AM) defect characterization is being shaped by rapid advancements in artificial intelligence (AI), automation, and next-generation characterization tools. AI-driven approaches, particularly those leveraging machine learning and deep learning, are increasingly being integrated into defect detection workflows. These systems can analyze vast datasets from in-situ sensors, such as optical cameras, thermographic sensors, and acoustic emission devices, to identify subtle defect signatures in real time. This enables predictive quality control, reducing the need for extensive post-process inspection and minimizing production downtime. For example, convolutional neural networks (CNNs) have demonstrated high accuracy in classifying porosity, cracks, and surface anomalies directly from layer-wise images or sensor data streams National Institute of Standards and Technology (NIST).
Automation is also transforming the landscape of defect characterization. Robotic systems equipped with advanced non-destructive evaluation (NDE) tools—such as X-ray computed tomography (CT), ultrasonic testing, and laser scanning—can perform high-throughput inspections with minimal human intervention. These automated platforms not only accelerate the inspection process but also ensure repeatability and consistency in defect detection Sandia National Laboratories.
Next-generation characterization tools are pushing the boundaries of spatial and temporal resolution. Techniques like synchrotron X-ray imaging and high-speed infrared thermography provide unprecedented insights into defect formation dynamics during the AM process. The integration of these tools with AI and automation is expected to enable closed-loop control systems, where real-time defect detection triggers immediate process adjustments, paving the way for truly intelligent and adaptive manufacturing environments Lawrence Livermore National Laboratory.
Conclusion: The Path Forward for Defect-Free Additive Manufacturing
The pursuit of defect-free additive manufacturing (AM) hinges on the continuous advancement of defect characterization techniques. As AM technologies mature, the integration of real-time monitoring systems, advanced data analytics, and machine learning algorithms is becoming increasingly vital for early detection and mitigation of defects. In-situ monitoring methods, such as optical imaging, acoustic emission, and X-ray computed tomography, are being refined to provide higher resolution and faster feedback, enabling immediate process adjustments and reducing the likelihood of defect propagation National Institute of Standards and Technology.
Collaboration between industry, academia, and standards organizations is essential to establish robust protocols for defect identification, quantification, and classification. The development of comprehensive databases and standardized benchmarks will facilitate the comparison of results across different platforms and materials, accelerating the adoption of best practices ASTM International. Furthermore, the integration of predictive modeling with empirical data promises to enhance the understanding of defect formation mechanisms, guiding the optimization of process parameters and material selection.
Ultimately, the path forward for defect-free AM lies in a holistic approach that combines advanced characterization tools, intelligent process control, and standardized methodologies. By fostering innovation and cross-disciplinary collaboration, the AM community can move closer to realizing the full potential of additive manufacturing—delivering components with superior quality, reliability, and performance for critical applications NASA.
Sources & References
- National Institute of Standards and Technology (NIST)
- ASTM International
- The Welding Institute (TWI)
- Lawrence Livermore National Laboratory
- U.S. Department of Energy Office of Scientific and Technical Information
- American Society for Nondestructive Testing
- NASA
- Sandia National Laboratories


